This material was taken from the proposed Instructor's Manual to accompany the second edition of Information Systems. This described how I used two overheads in a dual presentation of the class lecture. The publisher chose not to include this material since it was too different from what instructors were accustomed to using. Added emphasis appears in red.
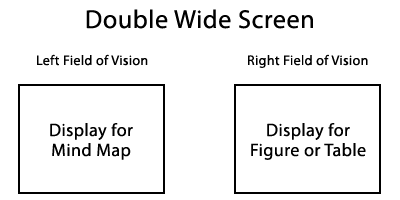
As a separate unit, transparency masters are provided for all figures and tables (illustrations) and for the Mind Maps that go with each chapter. Together the maps and illustrations provide effective whole brain support for classroom lecture. To take maximum advantage of the displays, two overhead projectors are required. They are arranged to show the Mind Maps and illustrations side-by-side as shown in the figure below.
The figures and tables are excellent lecture guidelines since the illustrations were prepared before any narrative was written. In this way the full topic coverage for a chapter was determined in outline form before a word was written. Then the illustrations were used to write the chapter draft. Therefore the chapter narrative covers the topics summarized in the illustrations. This means that using the illustrations for lecture notes ensures coverage of all key topics in a chapter.
To complement the illustrations, Mind Maps are a technique for graphically representing a subject. They are outlines in the form of a tree structure with branches out to successive lower levels of detail. The first map for each chapter consists of a center hub with the chapter title. From this hub the three or four major topics in the chapter branch out. Then for each major topic, a separate map presents the subtopics, subsubtopics, etc. for that unit of material. The use of Mind Maps as a study aid is presented in Tony Buzan's Use Both Sides of Your Brain (New York: E. P. Dutton, 1976). His book offers in depth instruction in the preparation and use of "brain patterns."
Students can work with the Mind Maps in two ways. First, "blank" maps for each chapter are included in the Student Workbook. The student completes the maps as they study the chapter similar to working crossword puzzles. The student "figures out" the words and phrases that will complete the branches in a consistent, coherent pattern. This puzzle forces concentration on the way the many ideas in a chapter tie together for a comprehensive understanding of the subject. The student compares their "solution" to the Mind Map presented in the class lecture.
Second, if the students do not use the Workbook, they can "copy" the maps as study aids when the chapter is reviewed in class. While the maps are shown on the overhead during the lecture, each student takes personal notes in the Mind Map format. This method is less effective than the Workbook puzzle since it relies more on rote copying than on thoughtful coming to grips with the topics.
Class lecture can be based on one of three uses of the transparencies:
- Illustrations (figures and tables) alone
- Mind Maps alone
- Dual display of Mind Maps and Illustrations
The dual display is by far the most effective. The first and second uses are equivalent to the traditional uses of overhead transparencies to support in class review of chapter material. Several distinct advantages are gained using the whole-brain dual display method.
As the figure suggests, the Mind Maps are shown on the left side of the screen (or wall if a large screen is not available) and the illustrations on the right. Both the maps and illustrations are designed to stimulate right hemisphere processing. However with their distinctive tree pattern, the Mind Maps are more supportive of right hemisphere processing than the illustrations, especially tables which are largely left hemisphere presentations of information.
The images in the left field of vision are routed primarily to the right hemisphere of the brain and the images in the right field, to the left. This contralateral pattern in the nervous system means that material intended for the right hemisphere should be shown in the left field of vision and vise-versa.
Each chapter has four or five Mind Maps and ten to fifteen illustrations. The illustrations are keyed on the map. Each Mind Map has the corresponding figures and tables indicated. The illustration keys on the Mind Maps refer the student to the next level of detail in the figures and tables. The three or four to one ratio of illustrations to maps means that the transparencies on the left projector will turn at about to one fourth the rate of those on the right.
In the lecture each figure or table is discussed in turn. The illustrations are explained to help ensure everyone understands the material. With the maps and illustrations as discussion guides, you can explain in more depth, add personal examples to clarify, develop points that seem especially difficult to grasp, etc. As the figures and tables for each major topic are completed, the Mind Map for the next topic is presented, briefly discussed and then the corresponding illustrations reviewed in turn. Depending on how much you elaborate, this chapter lecture takes from twenty minutes to over an hour.